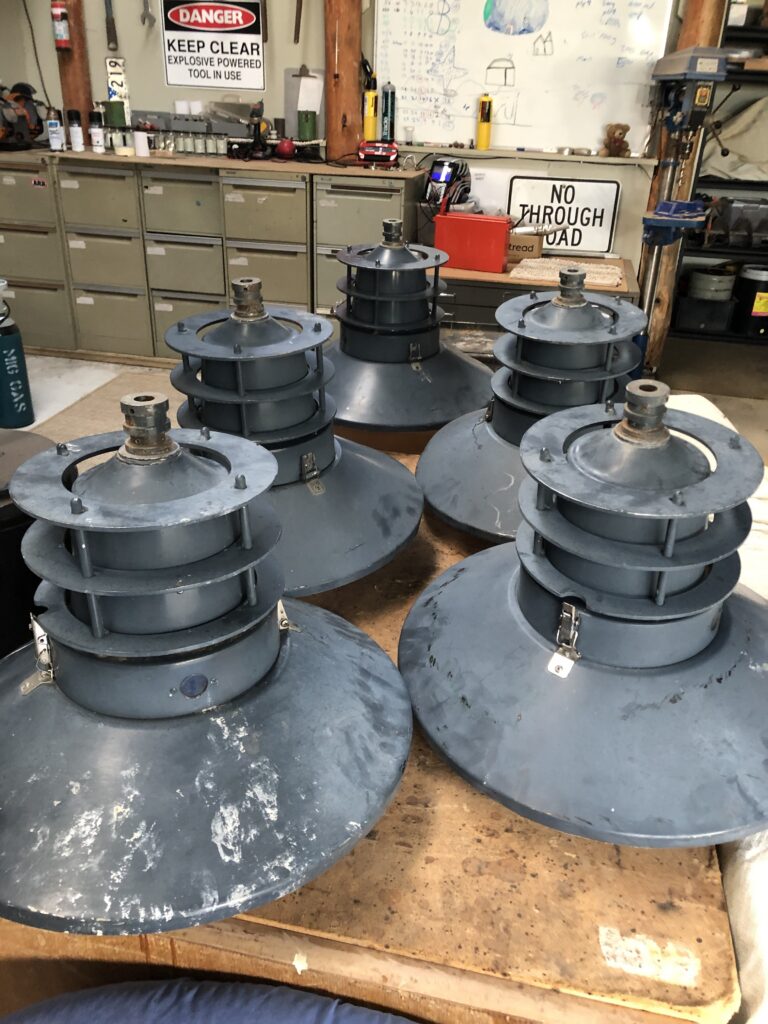
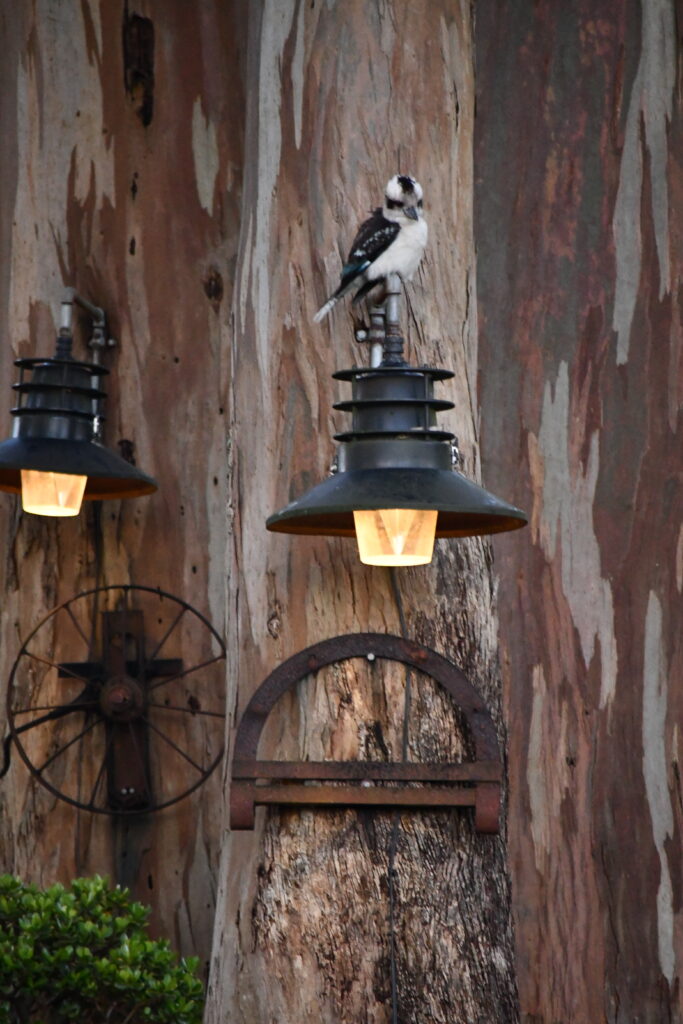
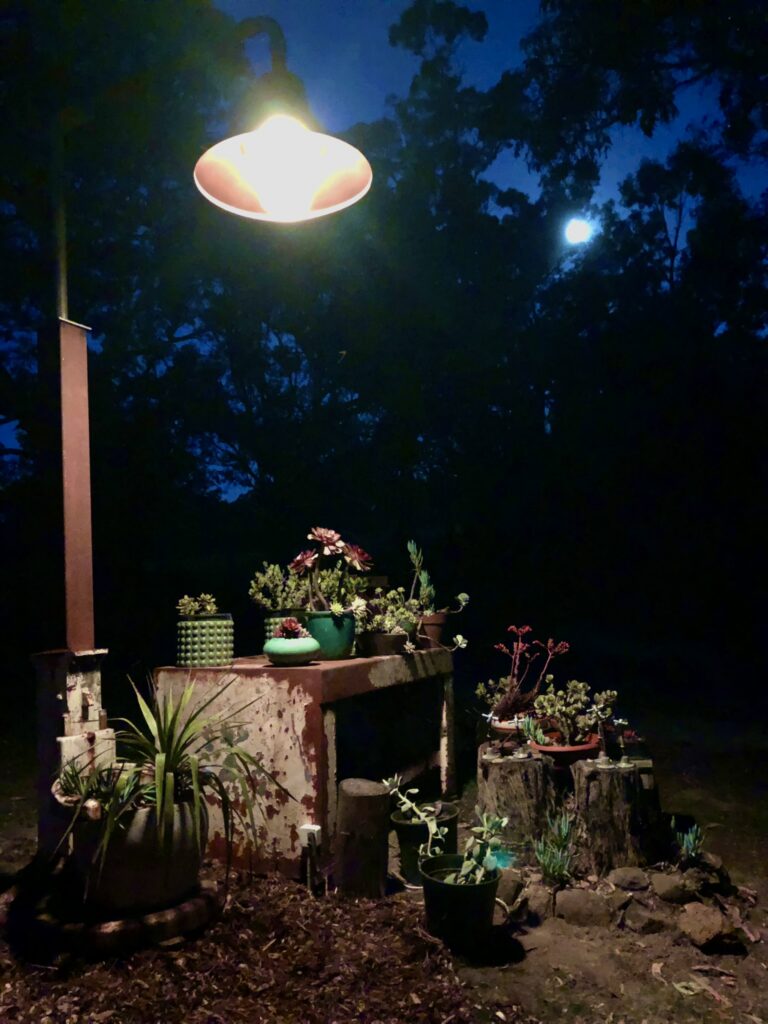
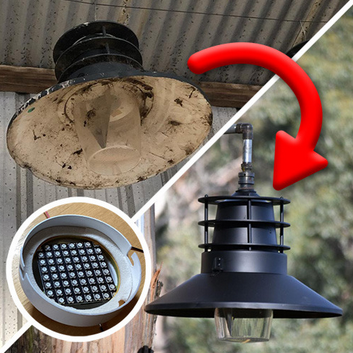
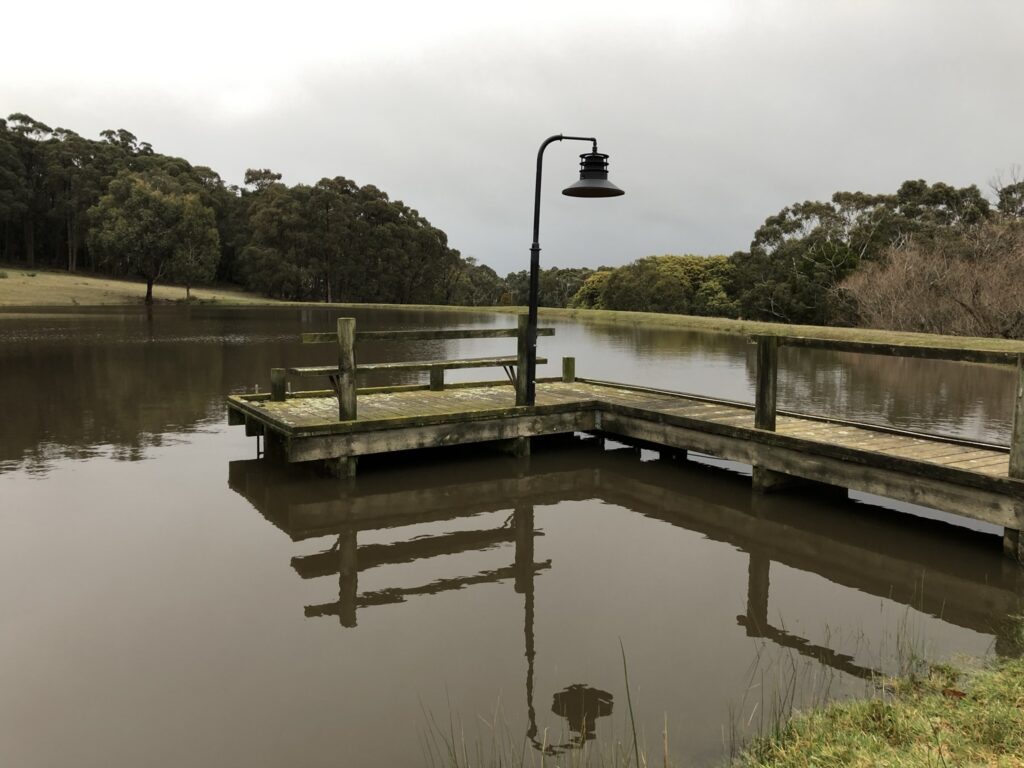
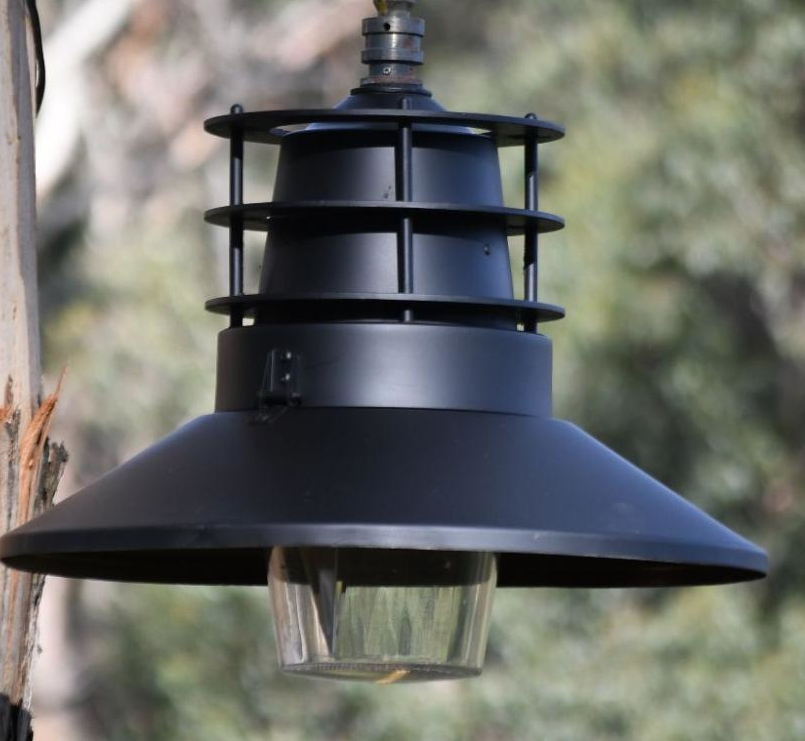
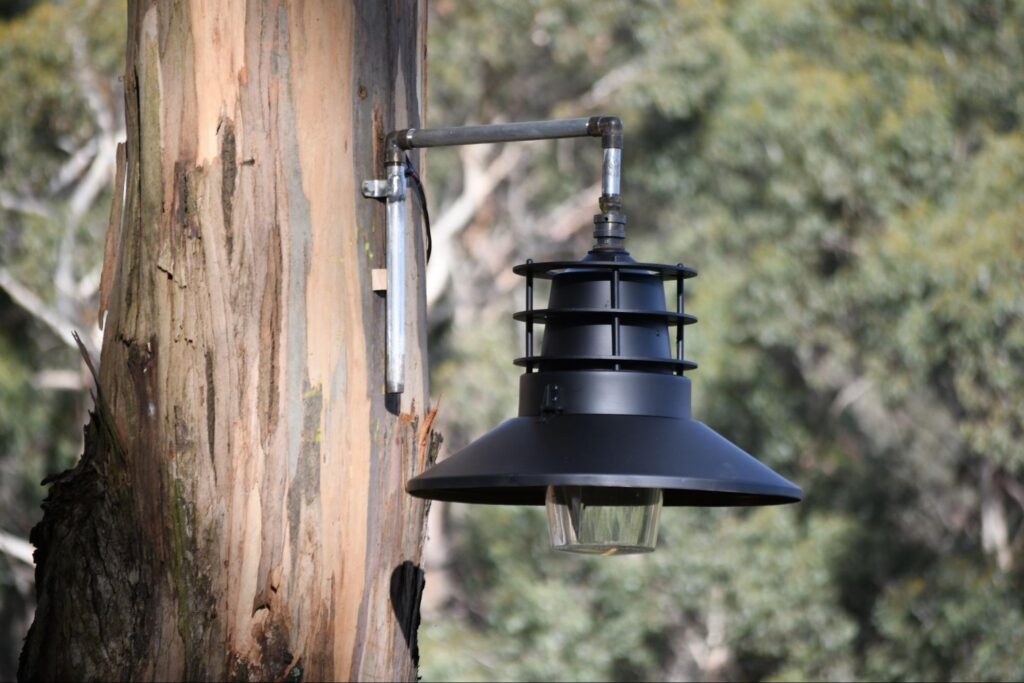
I salvaged a few decommissioned street lights from our local tip — battered but mostly intact. I suspect they once lit the main street of our town, and now they’ve found a second life as garden features. A bit of restoration, some creativity, and they’re back in action. We now have about 10 of these around our garden.
As a kid I wanted to make a pinball machine. So with just a few solenoids, a 3D printer, and some bits and pieces I’m going to make a two player 3D pinball thing. It will have multiple 5mm ball bearings flying around at high speed, it will be module based and reconfigurable, portable and run on a couple of 18650 batteries. I’m using an RP2040 Pico board to control the thing and tune it. It may not be needed in the final version.
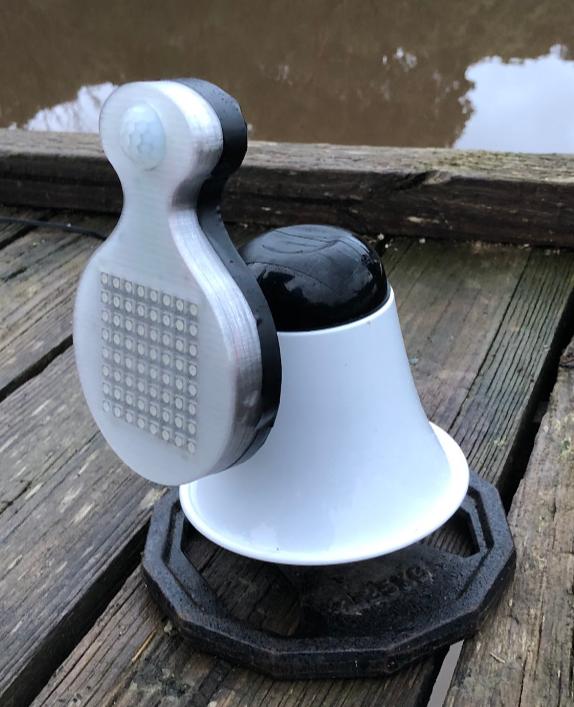
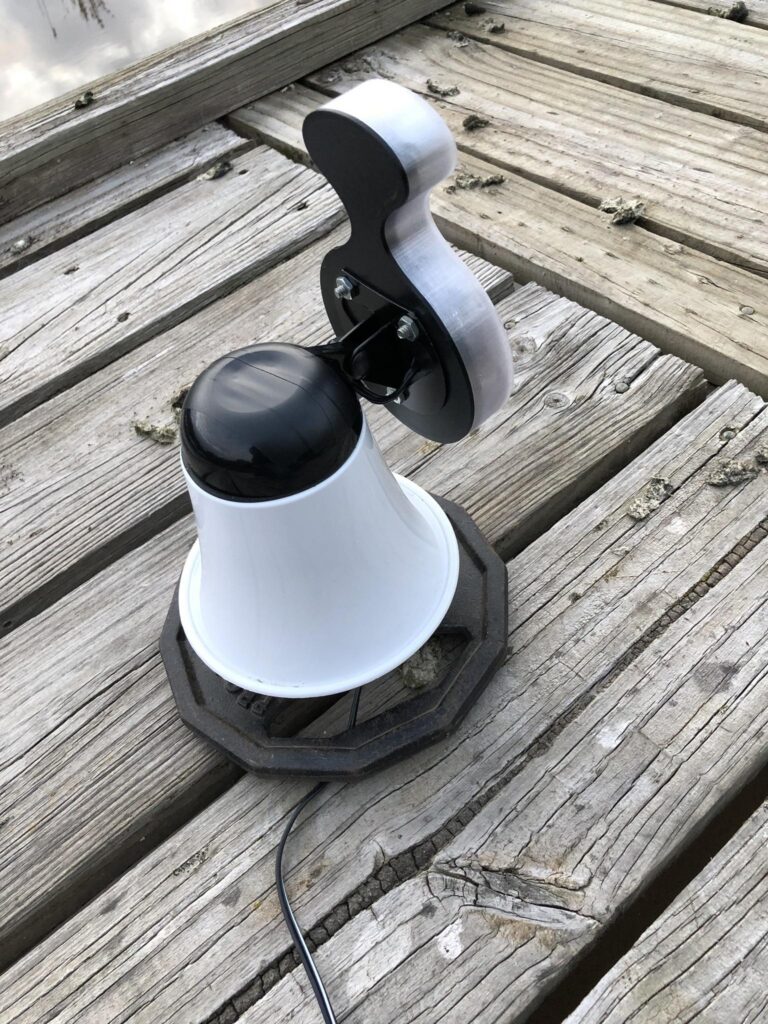
We live on a rural property and have around 20 -40 wild ducks around at any one time. We have a large dam and jetty, however it is almost unusable due to all the duck poo. So I decided to make a duck scarcer/repellent. We are more than happy to have them all wandering around, BUT not shitting on the jetty.
It uses both a passive IR and a microwave presence sensor to detect ducks. Once triggered it delivers and light and sound show for 10 seconds, if within that time period there is still activity, it changes into Blast mode and really ups the shock and awe for another 10 seconds. It then goes into recovery mode.
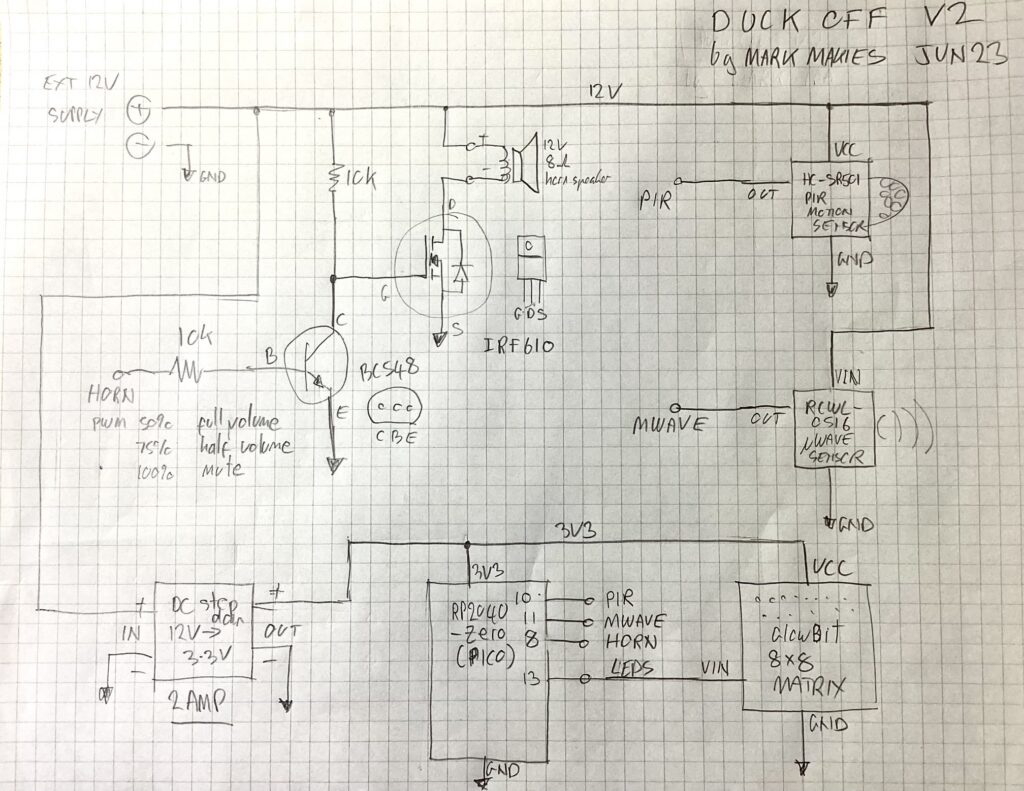
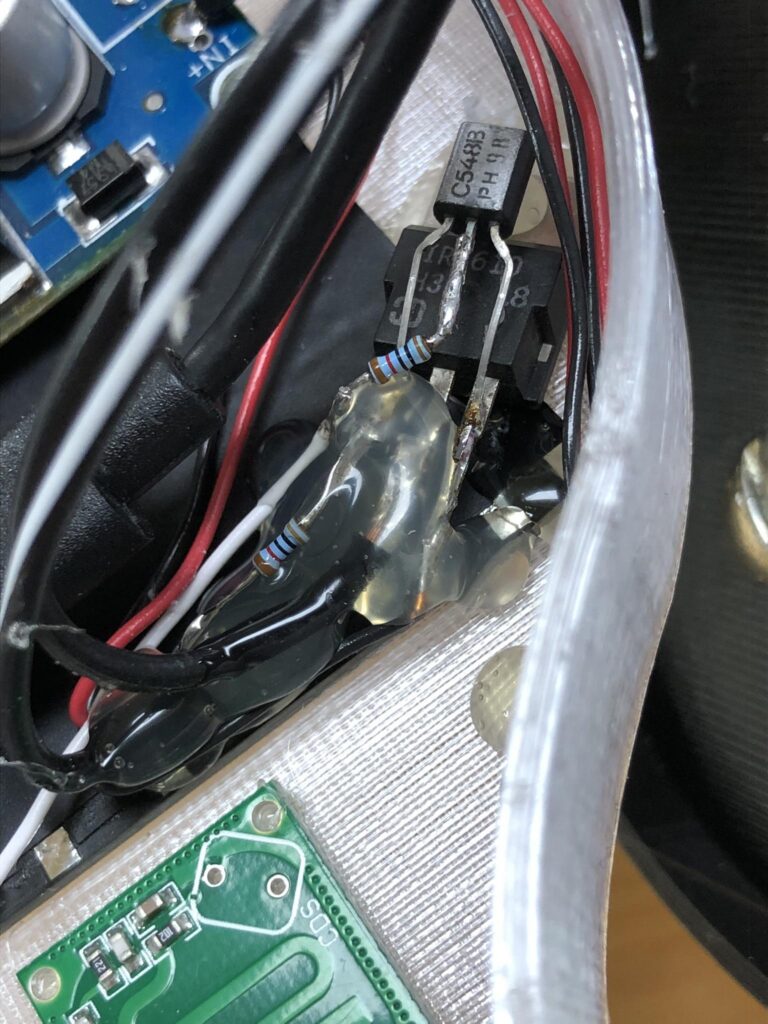
The noise is generated by a simple 2 transistor amplifier, fed from a PWM output and driving a 12V 5W horn speaker (because that is what I had lying around). The Play routine takes a list of tuples and plays varying frequency and volume combinations that are customizable and hopefully scary to ducks. Their hearing range is similar to ours. The Play routine also drives the strobe lights, which are hopefully also scary.
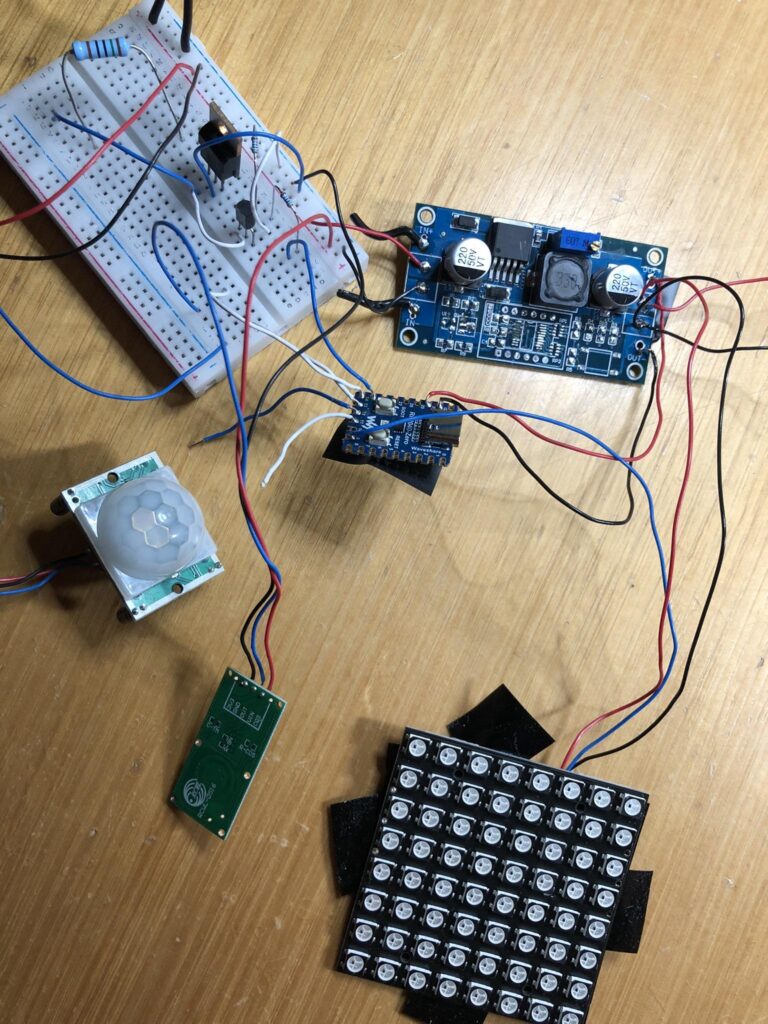
Parts • RP2040 Pico board (or anything that runs Micropython I suppose and has a PWM output) • GlowBit 8×8 Matrix of LEDs • RCWL-0516 Microwave sensor HC-SR501 • HC-SR501 PIR Motion Sensor • 2x 10k resistors • BC547 Bipolar (or whatever is NPN lying around) • IRF610 FET (or whatever is NFET lying around that will handle an amp or so) • 12V 5W Horn Speaker • 12V -> 3.3V 2A step down regulator • 12V Power source (on standby expect 35mA, but pushing 2A when triggered)
Schematic
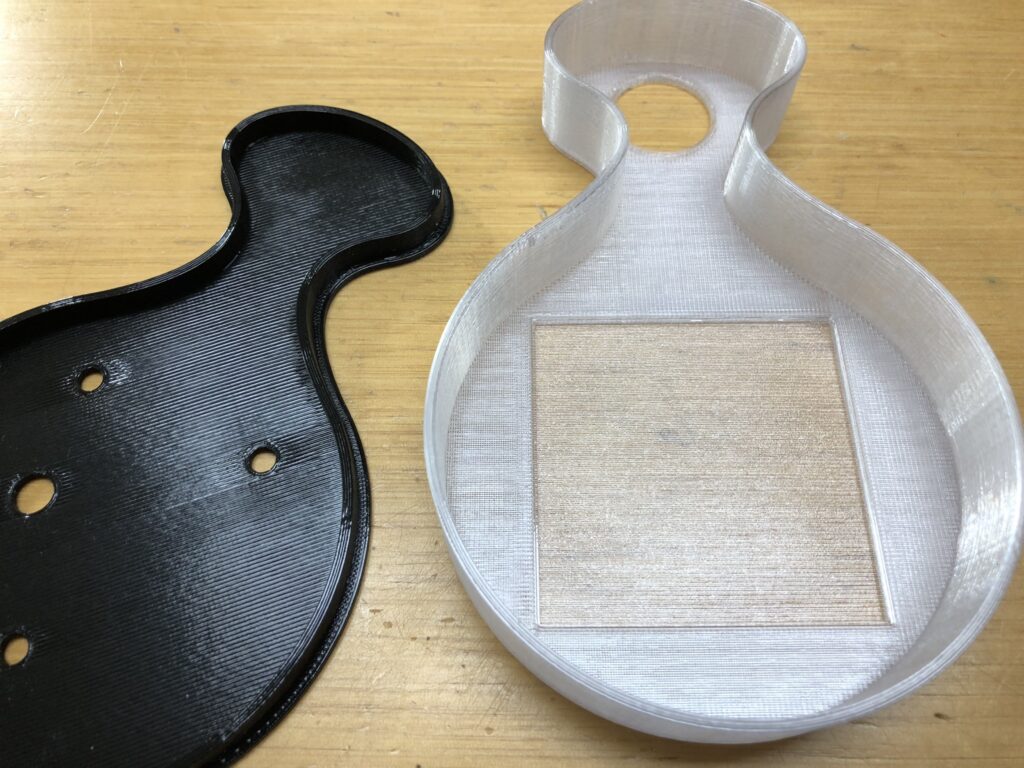
Enclosure – 3D printed
Design files in FreeCAD format + 3D models in step format + 3mf Prusa format
Back shell, pretty straight forward PLA print
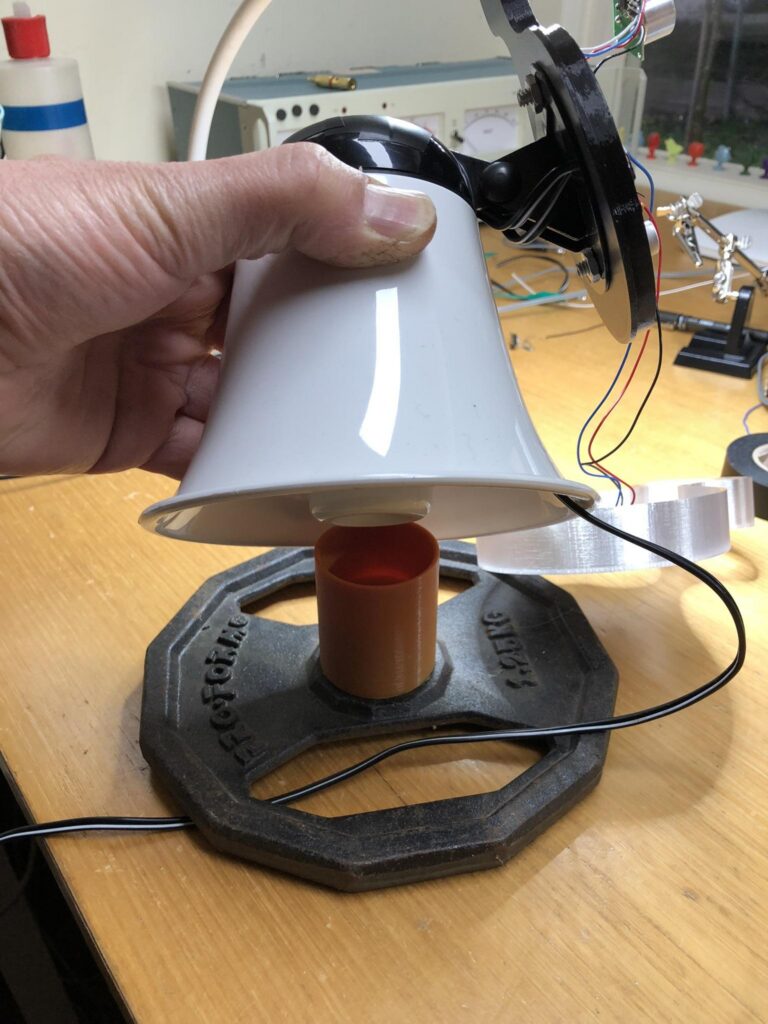
Front shell is translucent PETG – pay particular attention to the first layer. It is only one layer thick, but also uses 150% flow, otherwise not as watertight. I used the horn bracket to mount as it already allows for angle adjustments.
My printer is a Prusa i3 and I use generic branded filaments
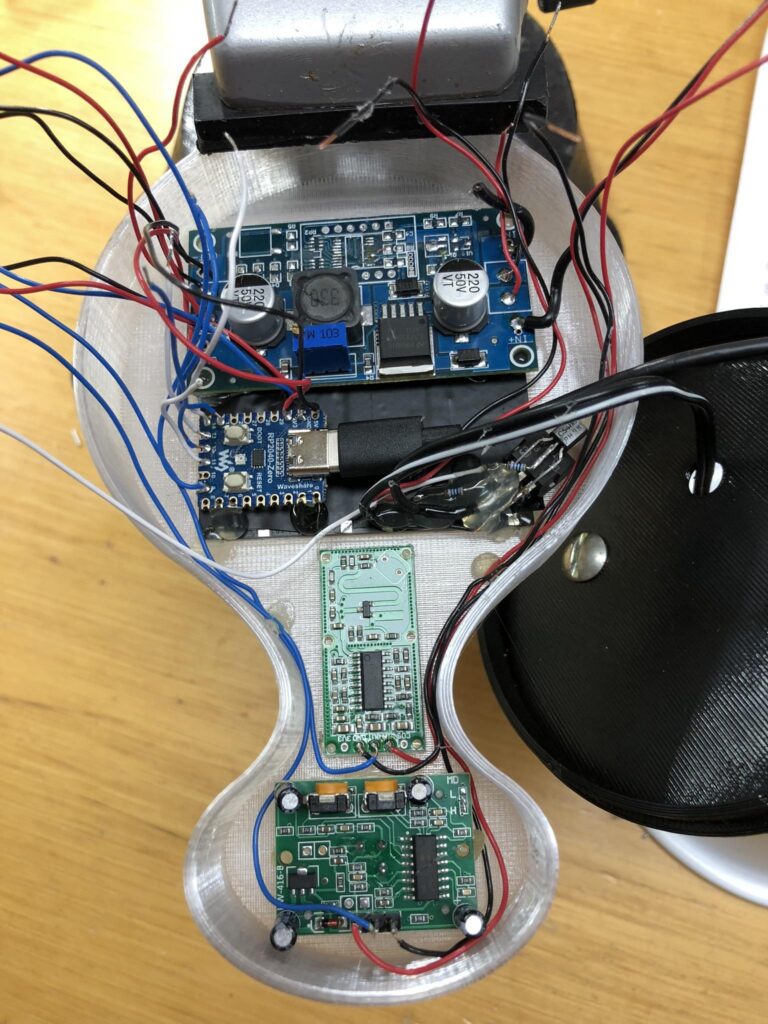
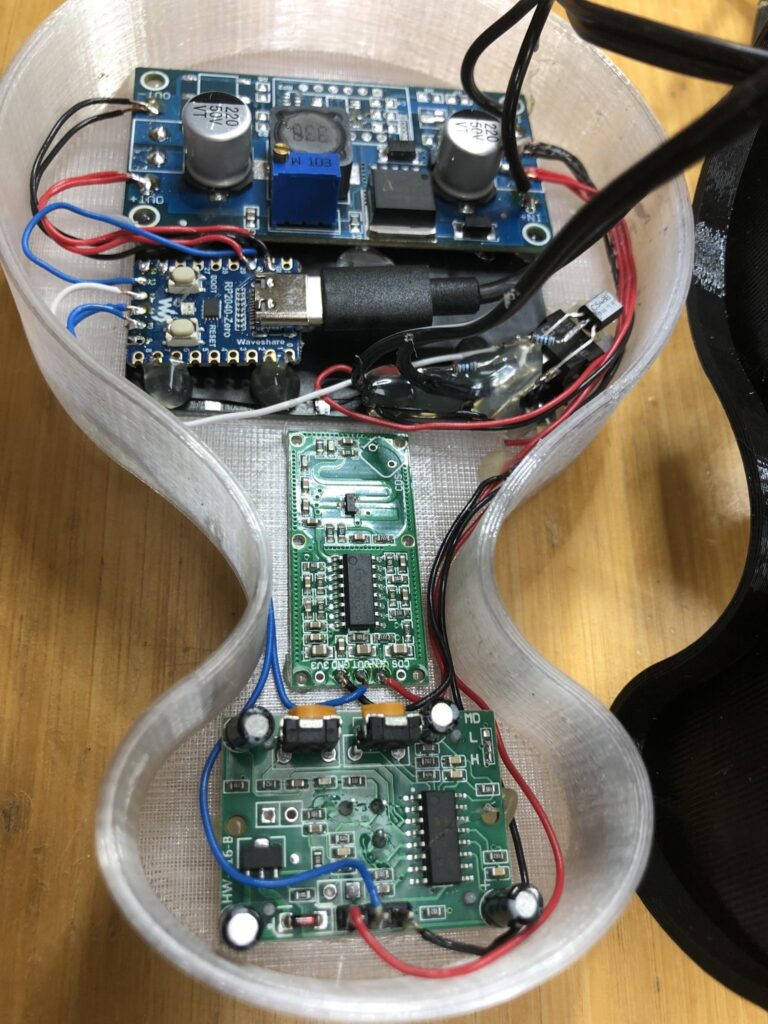
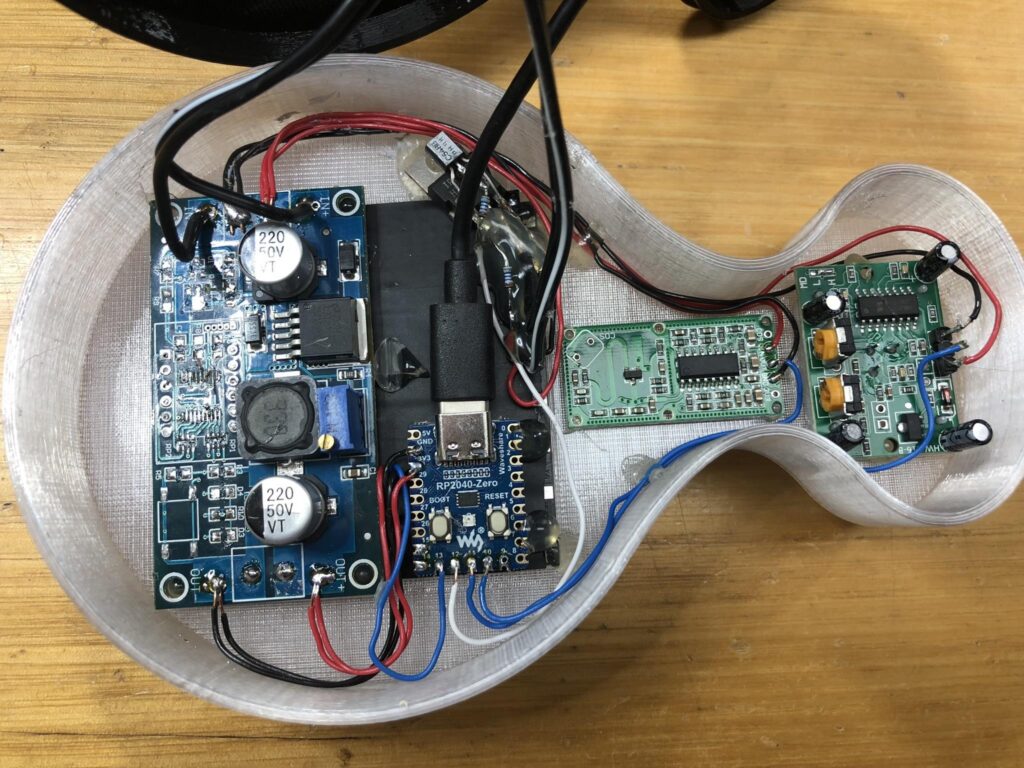
Assembly
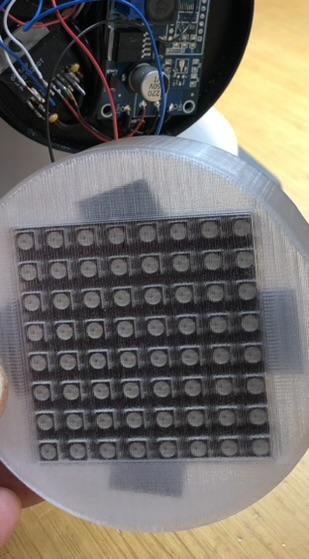
LED matrix first, it sits firmly in the rebate. Then attach with hot glue and cover back with electrical tape. (make it thick, I blew up an MPU when a pin poked through to the solder pad on the LED PCB.)
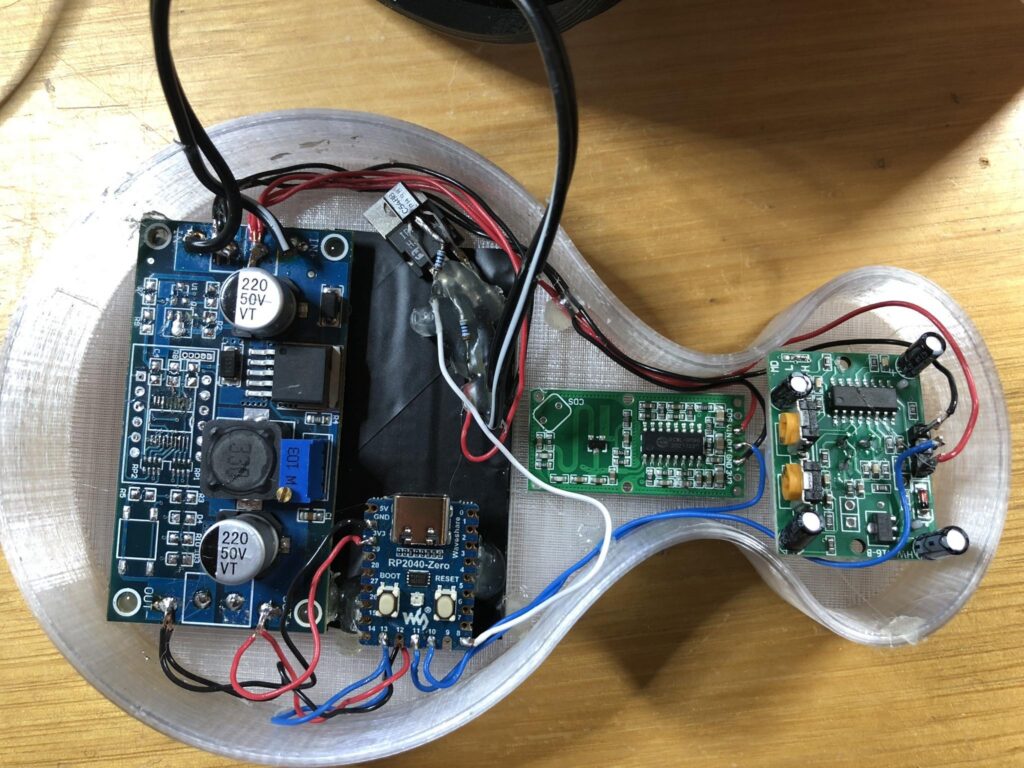
Then on top of that, hot glue power supply, transistor circuit and MPU. I’ve left it at an angle so I can easily get a USB-C plugged in (shown)
Microwave sensor goes in the neck area and PIR at the head. All hot glued in.
Then just solder it up.
Extra Pics
These videos show it in action. First there is a count down to get clear and then it is armed. I then just waved my hand to trigger it.
Extra Information added 5/7/2023
Duck Off has now been deployed out in the weather and on the jetty for 20 days of service. An area of about 4 x 2 m directly in front of Duck Off is completely clear of poo. 🙂.
PIR sensitivity needed to be turned all the way down otherwise there were many false triggers. Possibly wave action on the water due to wind, but I am unsure and couldn’t identify any other possible sources.
Waterproofing: It is critical to seal around the PIR plastic lens, this is where most water ingress occurred. I disconnected the lens from the PCB then siliconed it onto the front shell and then reattached the PCB.
To do this whilst not getting too much silicon on the lens and to ensure a tight seal, I first smeared the inside edge of the cutout with a bead of silicon. I found that if you do it from the front side and scrap a screwdriver edge of silicon through the opening and it deposits and sticks as neatly as possible to the inside. Then press the lens into position – watch orientation as the holes are not in a square pattern. When set, press the PCB back into place which I additionally secure with hot glue.
The back has 4 holes, 3 for mounting to the horn speaker and one for the power and speaker cables. Cover them with silicon and I also cover the cable exit on the back with silicon.
I’ve decided to join the two shells using silicon. Apply a small bead all the way around on the inner edge of the clear piece, then just press on for a tidy join that doesn’t need much if any cleanup.
I was worried about ingress on the single layer front, but it doesn’t appear to be a problem, so I’m not coating it with epoxy as previously thought. I have added a 1mm bleed hole drilled into the bottom of the clear shell to assist with condensation clearing.
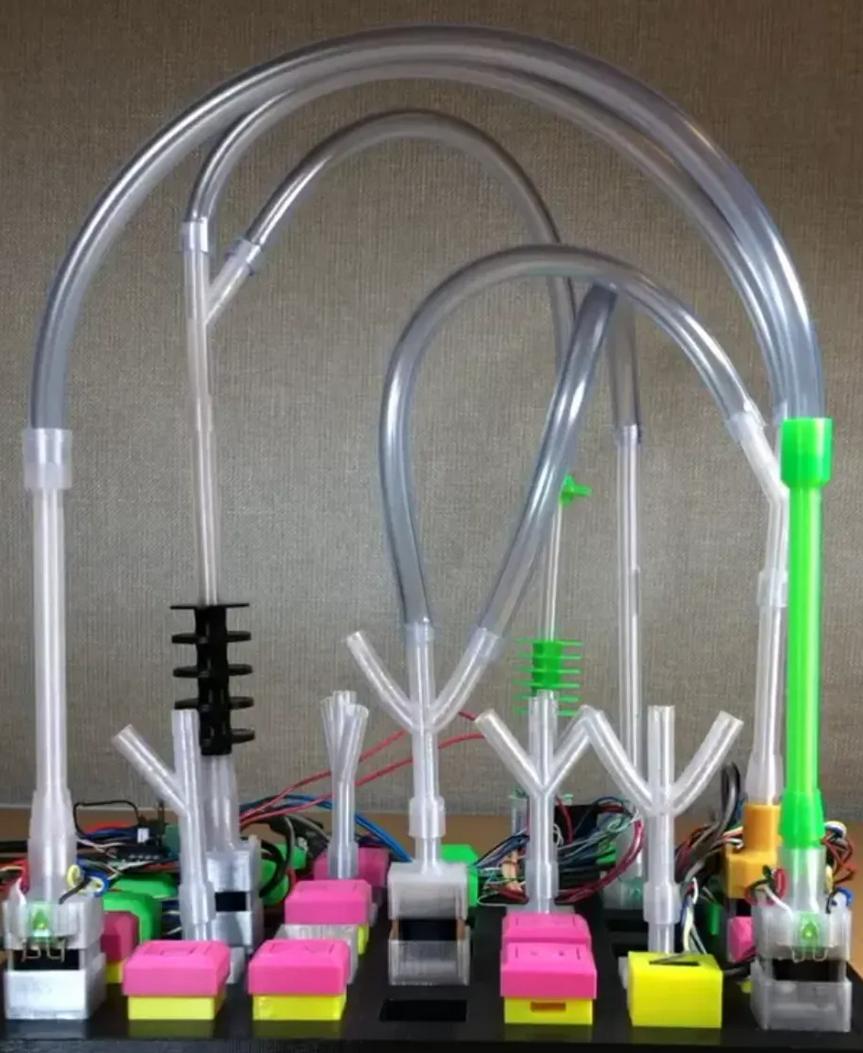
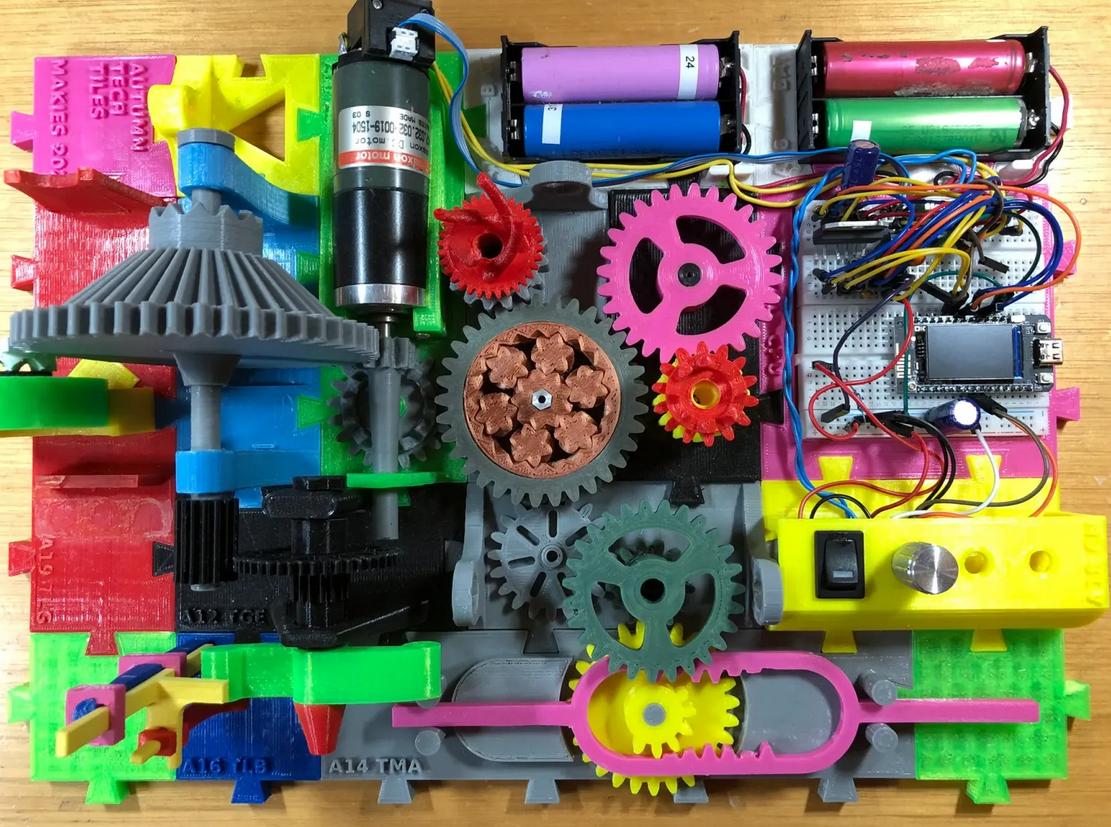
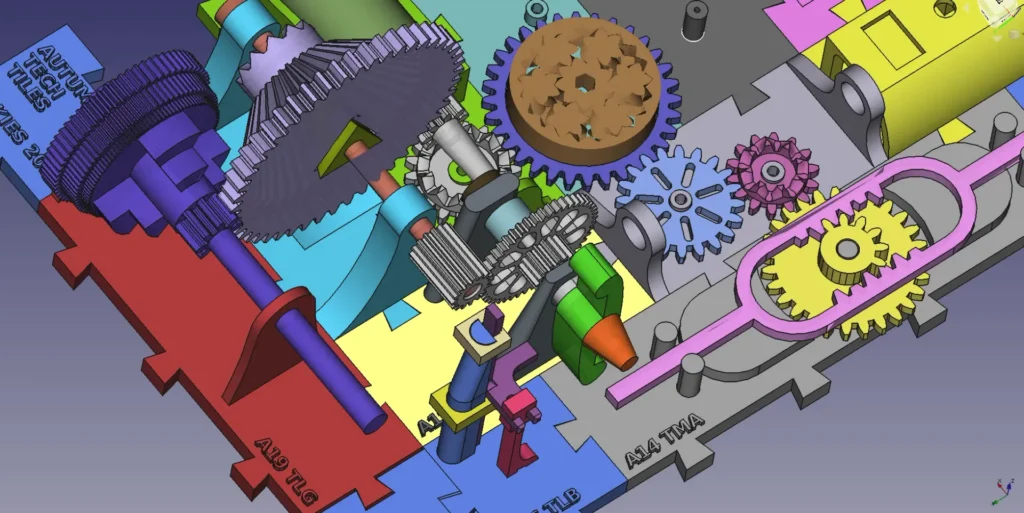
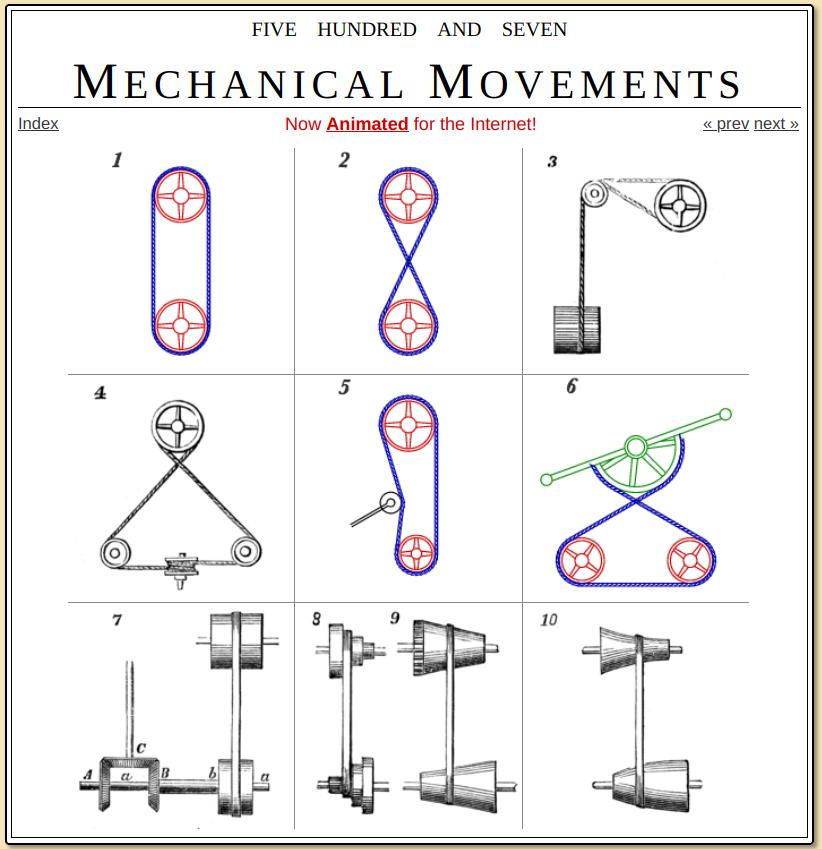
Rather than a complete project, this is a library of 3D printable parts. It was designed to teach kids mechanical movements and was inspired by http://507movements.com/.
BTW they are called Autumn because that’s when they were designed and printed – when it was too cold for outside activities.
All the ’tiles’ interlock. My idea was to create as many of the movements described in this very old text as I could.